
 27.07.2021
Using a third-party DNS server on your TP-Link Wi-Fi 6 router is a great idea, as you get to enjoy faster web browsing, improved reliability, and protection against malicious websites for your entire network. If you want to see the DNS settings used by your TP-Link router and change the DNS servers to those maintained by Google, Cloudflare, OpenDNS, or other providers, follow this guide:
NOTE: If you don’t know what a DNS server is, and why you need them, read this guide: What is DNS? How is it useful? Also, here are eight reasons to use public DNS servers on your wireless router.
How do I find the DNS on my TP-Link Wi-Fi 6 router?
You may want to see the IP addresses of the DNS servers used by your TP-Link Wi-Fi 6 router or access its DNS settings. Unfortunately, this can be done only from the firmware of your TP-Link router and not from the Tether app. To find the DNS settings used, first open your favorite web browser and navigate to tplinkwifi.net or 192.168.0.1. Enter the admin password for your TP-Link router, and press LOG IN.
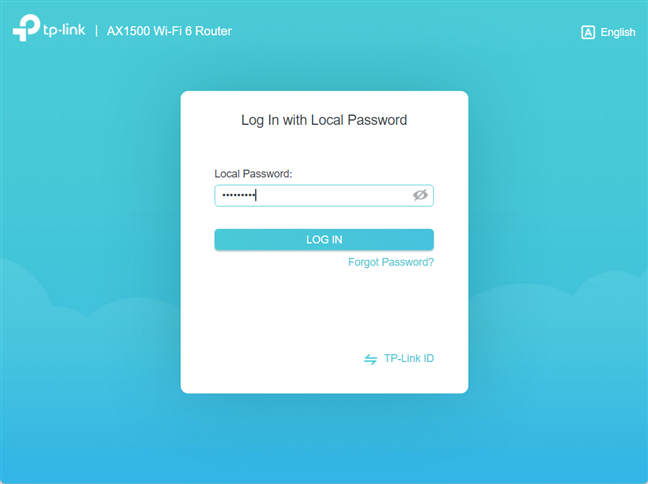
Enter the admin password and press LOG IN
TIP: If none of the two addresses mentioned above work, see all the ways to find the IP address of your router. Also, if the TP-link firmware is not in the language you want, here is how to change the language on your TP-Link Wi-Fi 6 router.
First, you see the network map, which doesn’t show the information you need. Click or tap Advanced to see a list of all the settings available.
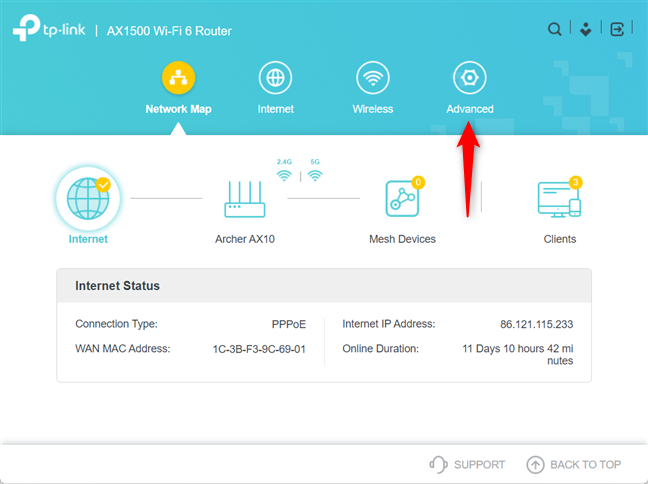
Go to Advanced on your TP-Link router
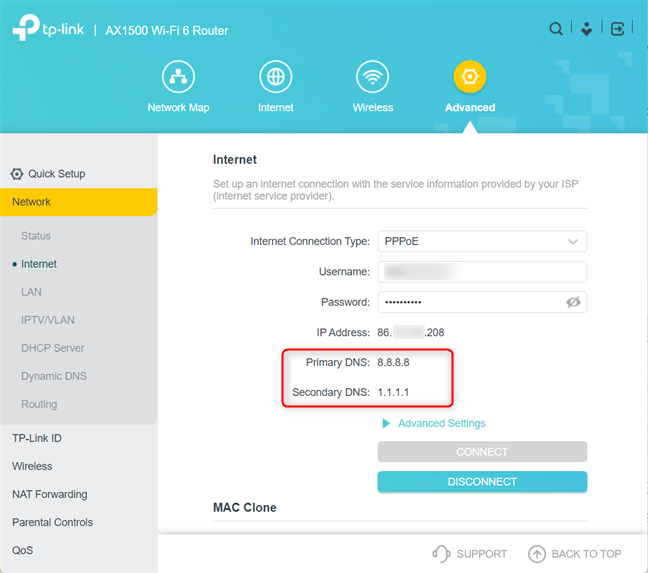
In the left column, go to Network -> Internet. Then, on the right, you see the details of your internet connection, including the Primary DNS and Secondary DNS servers used by your TP-Link Wi-Fi 6 router.
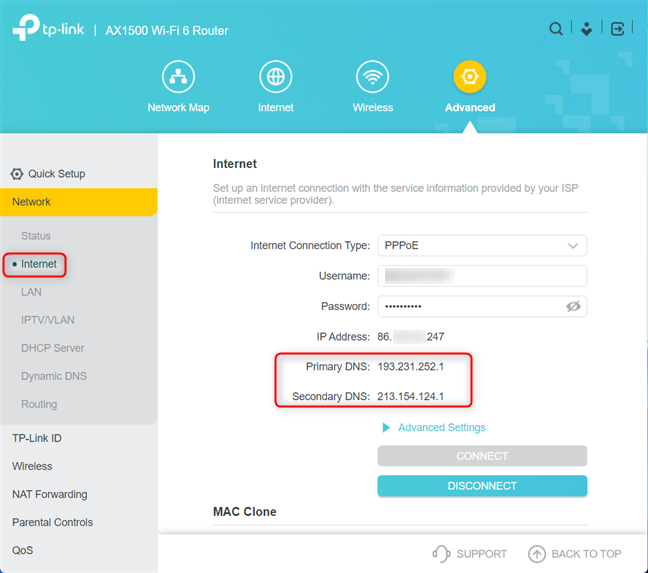
See the Primary DNS and Secondary DNS
TIP: Do you want to remote control your TP-Link router from anywhere on the internet? Here’s how to create and add a TP-Link ID to your TP-Link Wi-Fi 6 router.
How to set the DNS on your TP-Link Wi-Fi 6 router
If you want to change the DNS servers used by your TP-Link router, click or tap the “Advanced Settings” link under the settings for your internet connection.
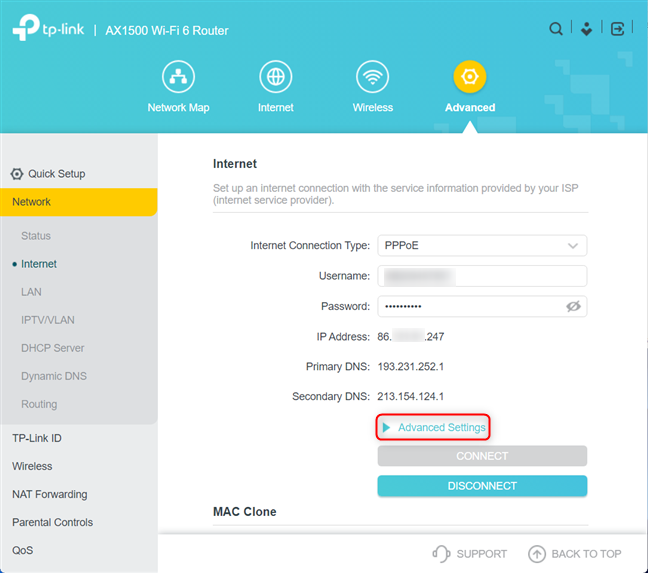
Click or tap Advanced Settings
Scroll down the settings to Primary DNS. Click or tap on “Get Dynamically from ISP” and choose “Use the Follow DNS Addresses.”
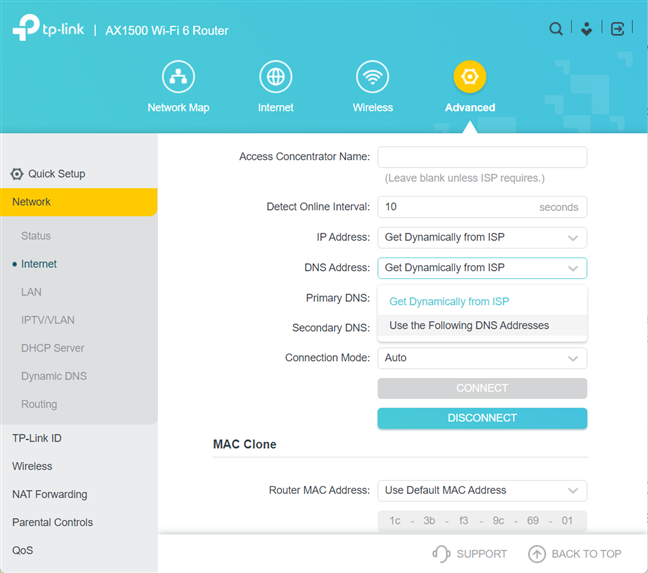
Select "Use the Following DNS Addresses"
Now the Primary DNS and Secondary DNS entries are editable and you can enter the IP addresses of the DNS servers you want to use. For example, we used Google’s DNS (8.8.8.8) as the Primary DNS and Cloudflare’s DNS (1.1.1.1) as the secondary. To apply these settings, first press Disconnect, so that the TP-Link router disconnects from the internet.
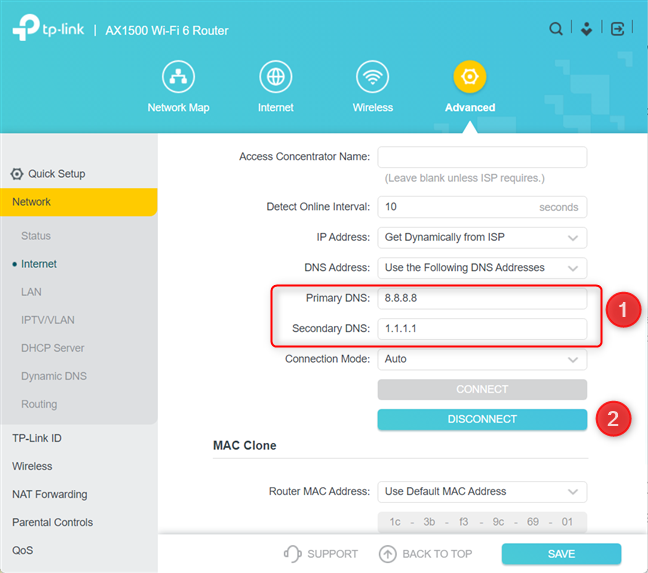
Enter the IP address for the Primary and Secondary DNS
Press the Connect button, and the TP-Link router reconnects to the internet and uses the new DNS servers that you have entered, instead of those provided by your ISP.
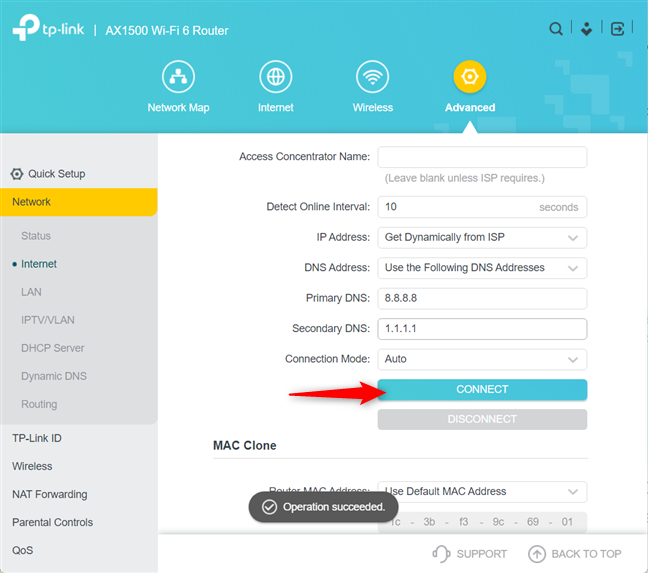
Reconnect your TP-Link router to the internet
When you minimize the Advanced Settings, you should see the TP-Link router using the new DNS servers.
The TP-Link router uses the new DNS settings
If later you want to reset the DNS settings to their defaults, repeat the same steps and choose “Get Dynamically from ISP” for your Primary DNS and Secondary DNS.
Did you successfully change the DNS servers on your TP-Link Wi-Fi 6 router?
Setting up the DNS servers used by your TP-Link router is not difficult. However, if you have encountered any problems during the whole process, let us know in the comments section below. Also, we’re curious to know which DNS servers you’re using on your TP-Link router. So don’t hesitate to share this information below.