04.11.2021
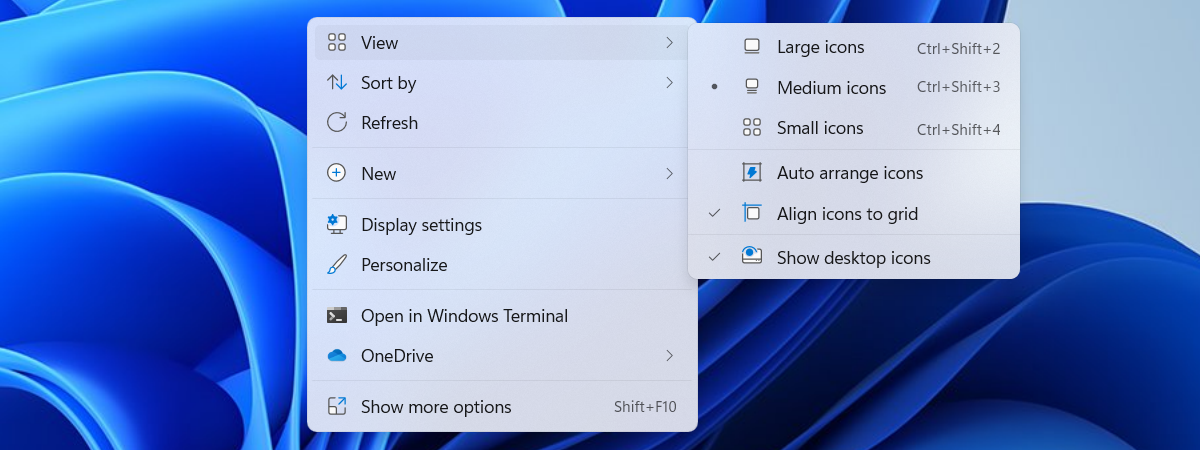
The Windows 11 right-click menu is just one of the many controversial additions to the new operating system. Its design is cleaner, the actions are more logically sorted, but so far, very few apps have updated the way they integrate into the Windows 11 interface, so you have to dig deep inside the contextual menu to find the associated actions. If you want a simple way to access or restore the old right-click menu in Windows 11, read on:
Accessing the old right-click menu in Windows 11
The new right-click menu from Windows 11 is quite different from the one used in Windows 10. It looks better and has a very different set of sorting rules to prevent it from reaching exaggerated sizes once you install all your favorite apps. If you want to know more about the new Windows 11 right-click menu, you can read this article.
It seems the user experience designers at Microsoft are aware of the fact that many apps haven’t yet updated their integration into Windows 11, so they inserted an option to display the old right-click menu in the new one. To access it, just right-click the item and then click on “Show more options”.
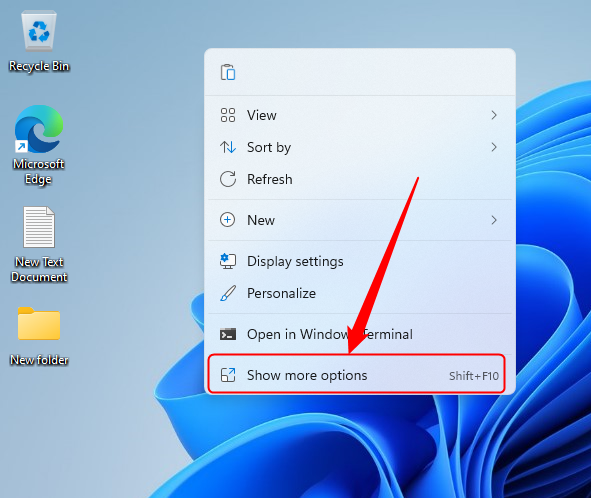
How to access the old right-click menu in Windows 11
This displays the familiar menu which was available in Windows 10. Alternatively, you can select the item and press Shift + F10 simultaneously on your keyboard to access the old menu directly.
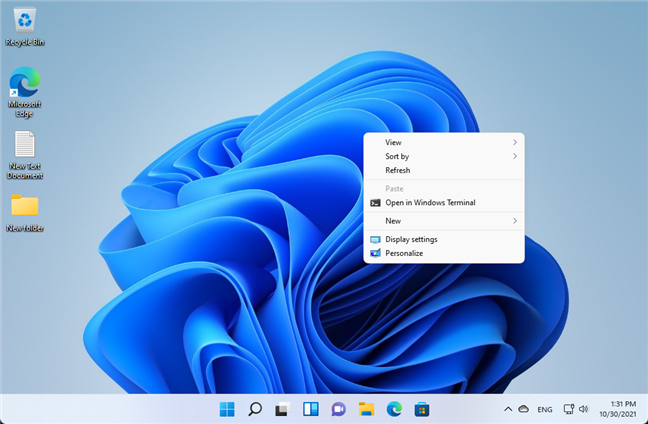
Open the old right-click menu in Windows 11 by pressing Shift +F10
Both of these actions take longer than a simple right-click, so in the next section, we describe a way to modify the interface so that right-clicking opens the old menu directly.
Restoring the old right-click menu in Windows 11 using Windows Terminal
To disable the new right-click menu in Windows 11, first start Windows Terminal as an administrator. One way to do it is by opening the Start Menu, typing terminal, right-clicking Windows Terminal in the result list, and choosing Run as administrator. Choose Yes in the User Account Control window that appears.
Now, you should type in the following command (or just copy it from here and paste it in the Terminal window) and then press Enter:
reg.exe add "HKCU\Software\Classes\CLSID\{86ca1aa0-34aa-4e8b-a509-50c905bae2a2}\InprocServer32" /f /ve
The interface should display a confirmation message once the command is executed.
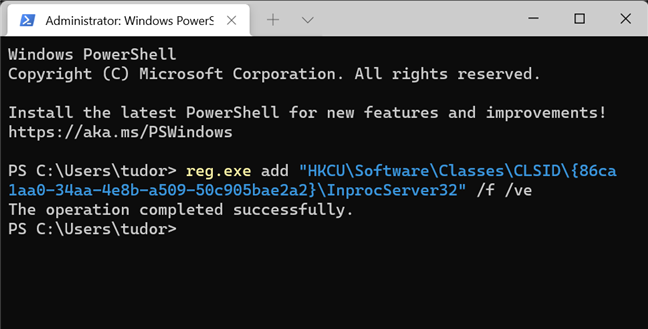
Remove the new right-click menu in Windows 11 using Terminal
Now, all you need to do is restart your system. The next time you right-click an item, the old menu should be displayed.
Hot to re-enable the default Windows 11 right-click menu
If you want to revert the change, just open Windows Terminal as administrator and execute the following command:
reg.exe delete "HKCU\Software\Classes\CLSID\{86ca1aa0-34aa-4e8b-a509-50c905bae2a2}" /f
This command removes the registry entry created in the previous section. You should get a confirmation message once the action is completed.
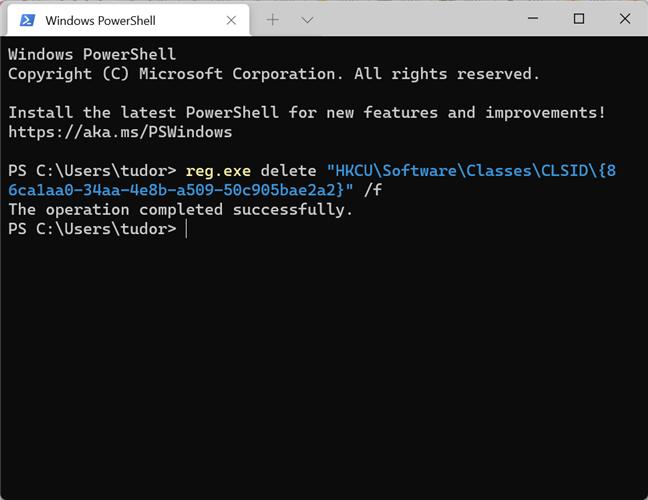
Re-enable the default Windows 11 right-click menu using Windows Terminal
Don’t forget to reboot your system for the changes to take effect.
Why do you want to remove the new Windows 11 right-click menu?
Now you know how to access and restore the old right-click menu in Windows 11. Before leaving this page, we’d like to know what annoys you most about the new context menu. Is it the lack of actions? Or maybe the slight delay from the moment you right-click an item? Let us know in the comments!