
 25.10.2023
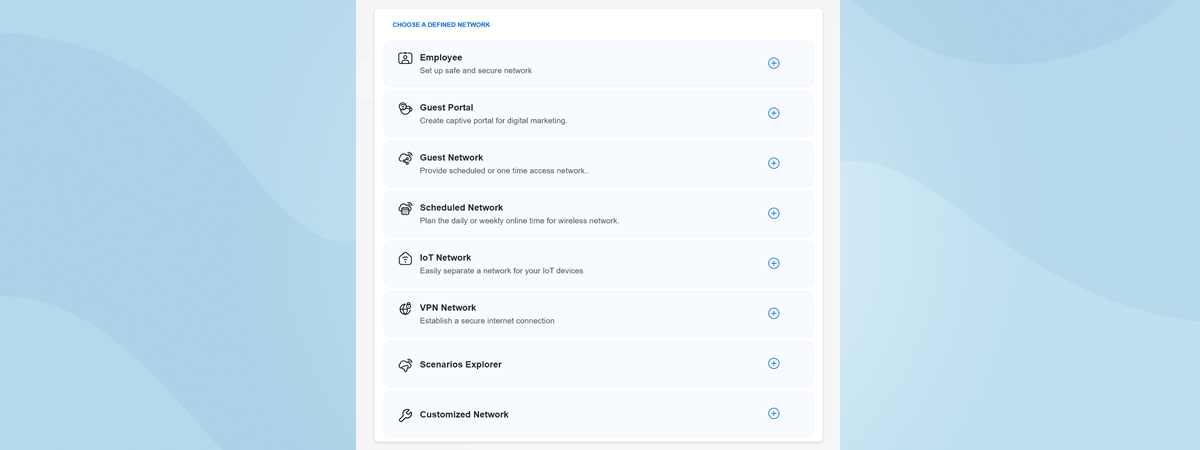
One of the defining features of the new ASUS ExpertWiFi family of networking devices is the Guest Portal. This portal allows your organization to give free Wi-Fi access to its customers (or guests) while promoting its brand(s) or location(s). The portal can use your company’s custom branding and visual templates and promote locations like the company’s official website, online shop, or social media page. If you want a router that can help you in your digital marketing efforts, here’s what the Guest Portal feature from the ASUS ExperWiFi family can do:
NOTE: The Guest Portal is available on all ASUS ExpertWiFi routers and business mesh systems. When creating this guide, I tested it on an ASUS ExpertWiFi EBM68 and an ASUS ExpertWiFi EBR63, and it worked great on both. No matter which ExpertWiFi model you use, the steps should be the same.
How to create and configure a Guest Portal from a web browser
Creating a Guest Portal and changing its settings can be done from a laptop or PC, using a web browser, or from the ASUS ExpertWiFi mobile app for Android and iOS. I’ll show you how to use both and start with the web browser.
Step 1. Log in to your ASUS ExpertWiFi using a web browser on your PC
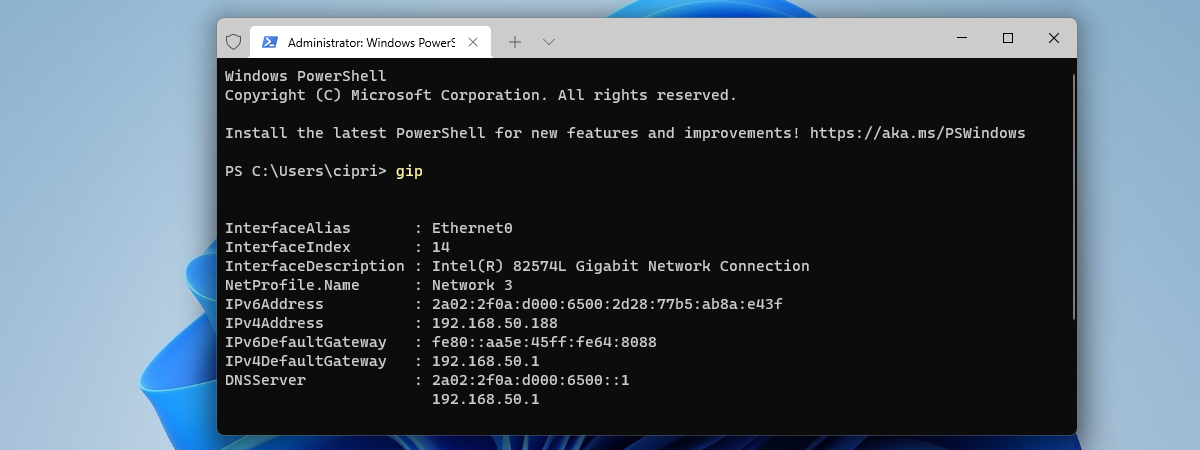
When you want to create or customize a Guest Portal, first, you must log in to your ExpertWiFi router or business mesh system. One way to do that is to open a web browser on a computer connected to the network managed by your ExpertWiFi and navigate to expertwifi.net or the IP address of your router or mesh system. Then, type the admin user account and password for your ExpertWiFi, and click or tap Sign In.
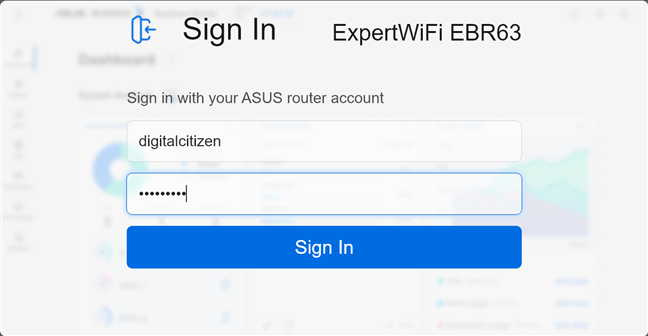
Log in to expertwifi.net
Then, you see the Dashboard for your ExpertWiFi.
Step 2. Create your Guest Portal
In the left sidebar, click Self-defined Network. If this is your first time using it, you see a wizard on the right side of the screen, guiding you through the process. You are first asked to choose the type of network that you want. Select Guest Portal.
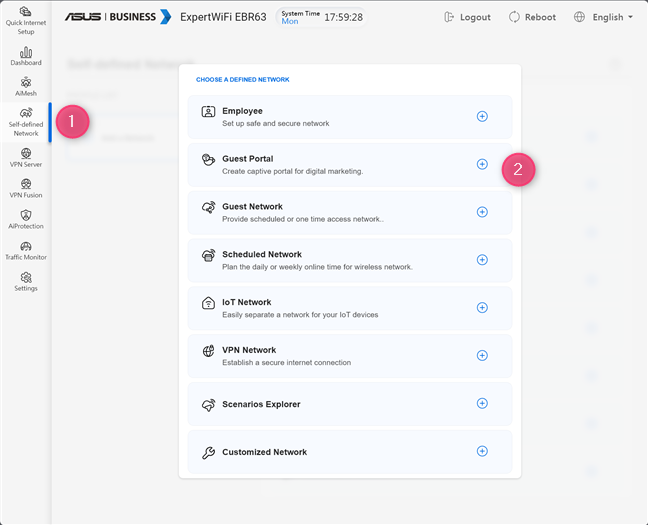
Go to Self-defined Network > Guest Portal
TIP: If you want to know more about the Self-defined Network feature and how it works, here’s how to use the Self-defined Network (SDN) on ASUS ExpertWiFi.
If this isn’t your first time using the Self-defined Network, you may see a list of profiles. If that is the case for you, choose Add a Network followed by Guest Portal.
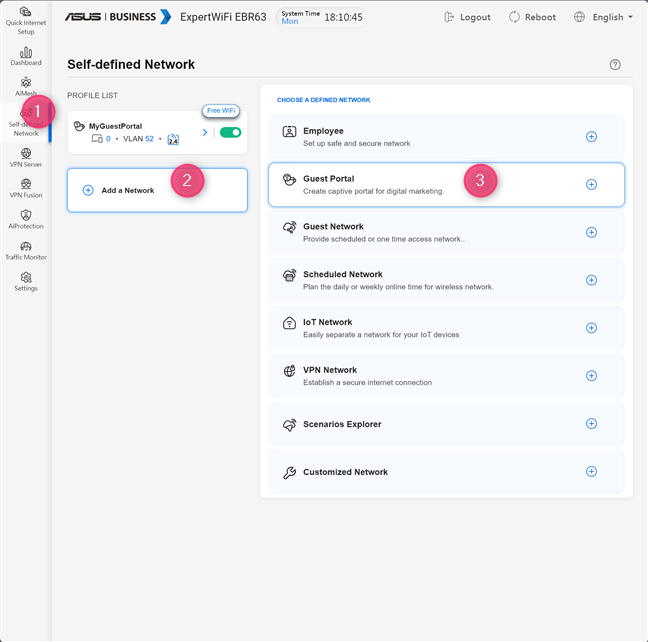
Go to Self-defined Network > Add a Network > Guest Portal
Then, you see the options for creating a Guest Portal. You are asked to type a network name (or SSID), choose the portal type, and enter the brand name you want to promote with your portal. Type the name you want people to see for your free Wi-Fi portal. Then, in the Portal Type dropdown list, make sure that Free WiFi remains selected. In the Brand Name field, type the name of your business, shop, restaurant, location, etc. By default, ASUS uses a background image that works well for a coffee shop. If you want to change it, click the Background icon on the top-left side of the image.
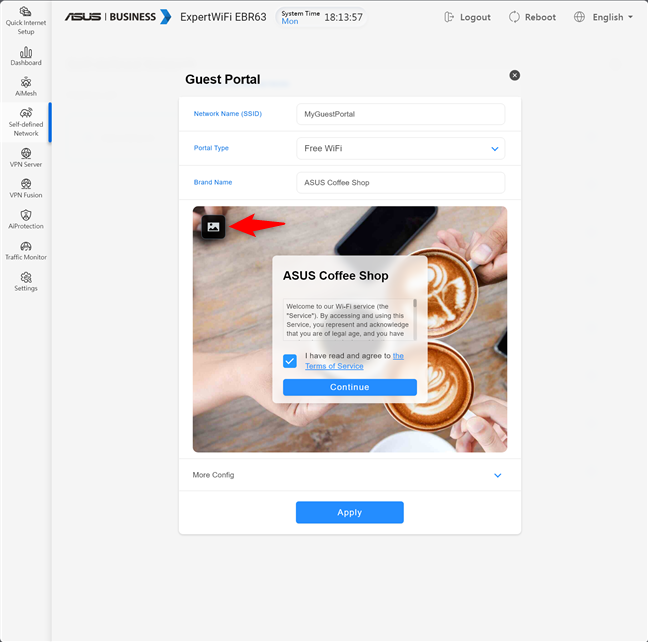
Complete the default Guest Portal options
You are then shown a list of background images you can choose from, which work well for various businesses. If you want to use an image of your own, click the + (plus sign), select an image from your computer, and click Open.
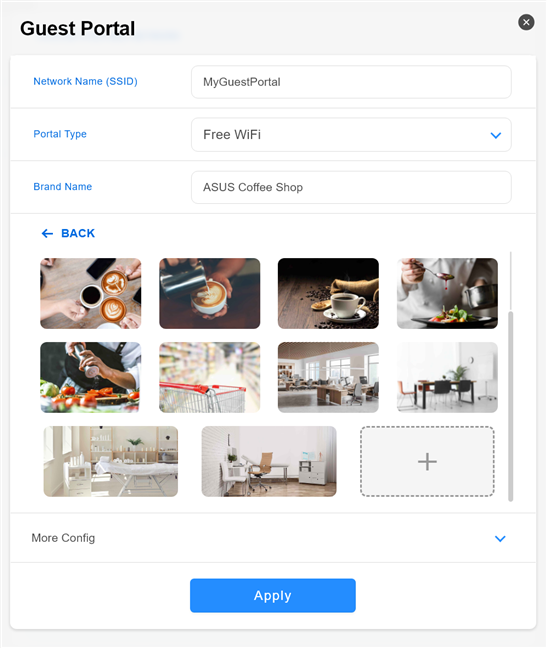
You can use a custom background image
You can click or tap Apply at this point, and your ASUS ExpertWiFi will create the Guest Portal in a couple of seconds. If you want to further personalize it, before creating it, click More Config.
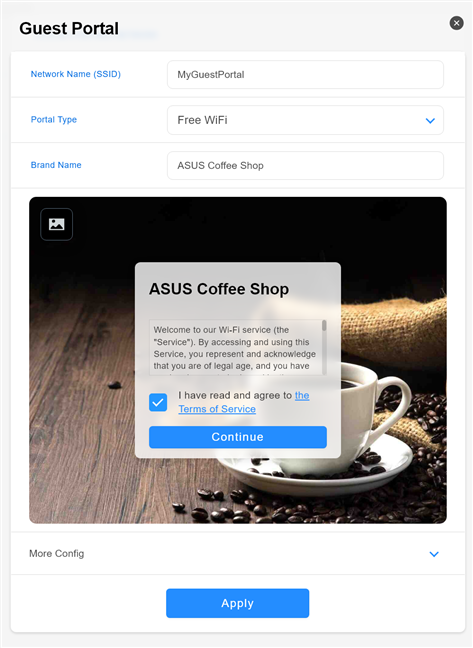
A personalized Guest Portal
This action opens a list with additional settings. First, you can choose the WiFi Band. If you want your employees to use a faster Wi-Fi and your guests to use a slower one, eating up less network bandwidth, choose 2.4 GHz instead of 2.4 GHz/5 GHz.
You can also enable the switch for WiFi Scheduling and set a daily schedule for when the Guest Portal is visible to your guests. If you enable the Bandwidth Limiter, you can also set how much bandwidth you want to make available for your guests. The last switch is for disabling Access Intranet. You should leave it disabled so that guests can’t get access to your company’s network and the network resources your employees can access. You want to keep your company’s network, servers, and resources unavailable to your guests for added security.

Clicking More Config reveals additional options
In the example below, I created a Guest Portal that broadcasts its signal only on the 2.4 GHz band, keeping the 5 GHz band free for the company’s employees. The portal is available to customers from Monday to Saturday, during opening hours (7 AM to 4 PM), and the bandwidth is limited to 300 Mbps for the download speed and 100 Mbps for the upload speed so that my company’s Wi-Fi has enough bandwidth left for business-critical applications.
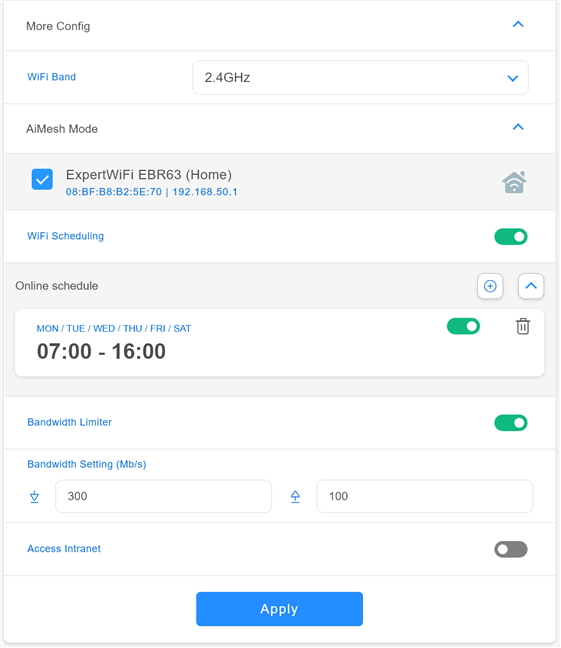
Configuring the more advanced aspects
Fiddle with the available settings, and don’t forget to click Apply to create the Guest Portal.
Step 3. Configure the more advanced settings for your Guest Portal
The initial wizard for creating a Guest Portal is focused on simplicity and covering the basics you may need. However, if you want to delve into more technical detail, you can after creating the Guest Portal. Log in to expertwifi.net, click Self-defined Network followed by the name of your Guest Portal. You then see all the available settings, split into several tabs.
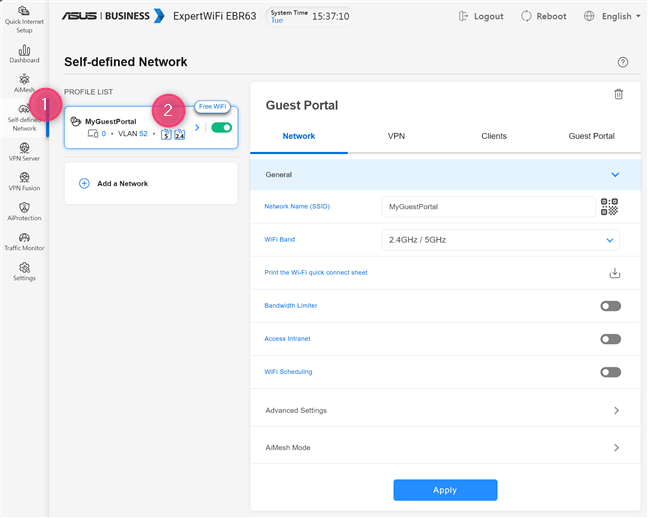
Go to Self-defined Network, and choose your Guest Portal
In the Network tab, you can customize the basic settings that were presented earlier, and you can also Print the Wi-Fi quick connect sheet. This option prints a page with a QR code, which allows users to connect to your network quickly. If you’re running a restaurant, a hotel, or a shop, you’ll love having this option. In the Network tab, you can also go to Advanced Settings and configure things like the IP addresses assigned to the devices connecting to the Guest Portal or the DNS servers used for them.
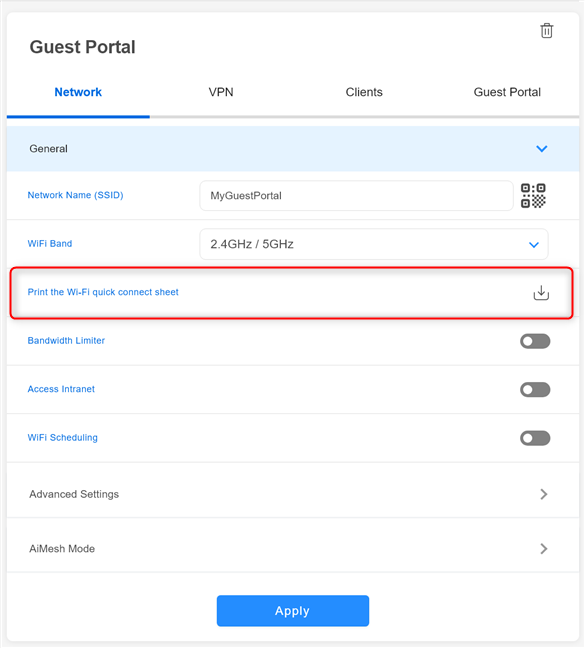
Print the Wi-Fi quick connect sheet
The VPN tab is where you can set your ExpertWiFi to function as a VPN server for the devices connected through the Guest Portal or set up different VPN tunnels for different clients.
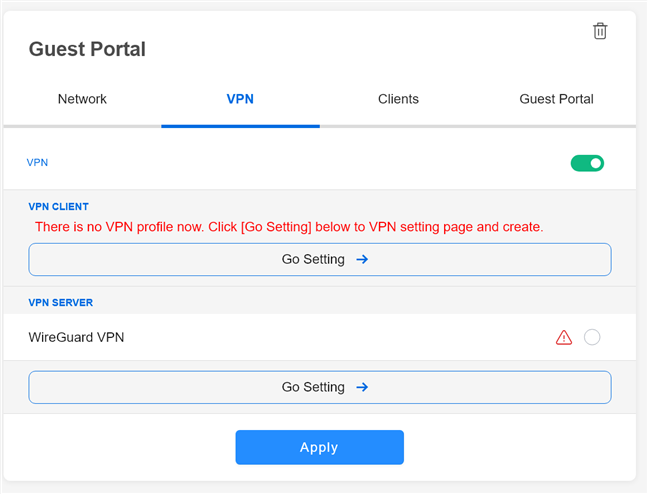
The VPN tab
The Clients tab shows which devices are connected to the Guest Portal and which connection they use.
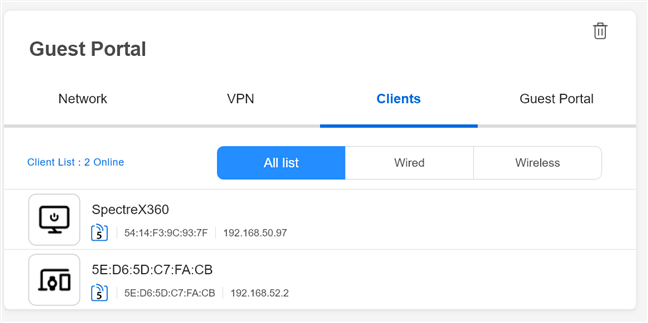
The Clients tab
The Guest Portal tab may be very interesting for many businesses. Here, you can add a Landing Page where your guests are automatically redirected when they connect to the portal. You can use this page to type the URL of your company’s official website, social media page, etc.. You can also personalize your Terms of Service for the Guest Portal to provide complete transparency that respects your local regulations.
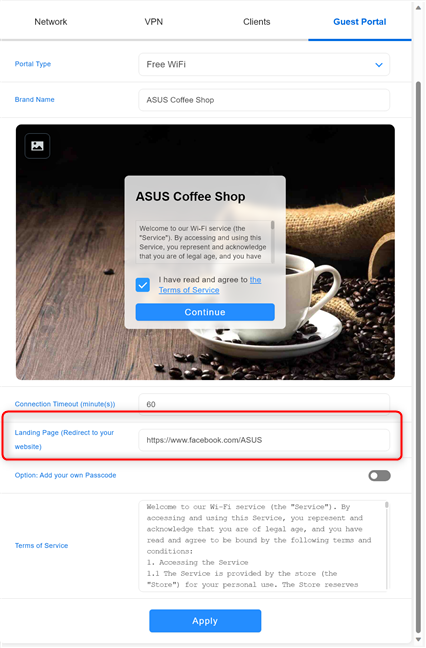
The Guest Portal tab
When fine-tuning the available settings, don’t forget to click Apply to ensure that the Guest Portal uses them.
How to create a Guest Portal from the ExpertWiFi mobile app
You can also use the ExpertWiFi app for Android and iOS to create a Guest Portal. However, you first need to connect the app to your ExpertWiFi. Once you do that, follow these steps:
Open the ExpertWiFi app and tap on SDN after loading the Home tab.
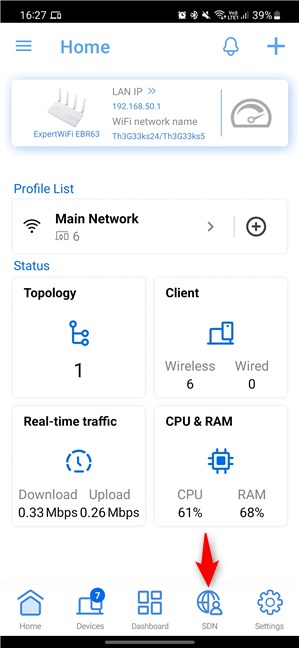
In the ExpertWiFi app, tap SDN
In the list of networks you may want to create, choose Guest Portal.
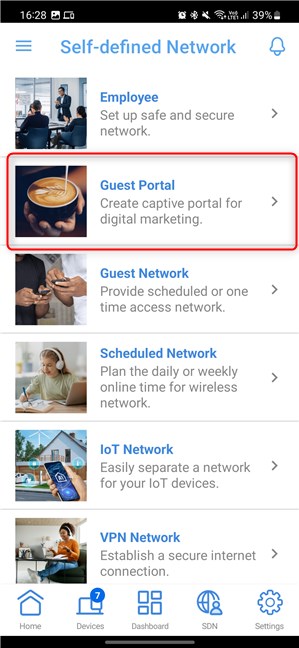
Tap Guest Portal
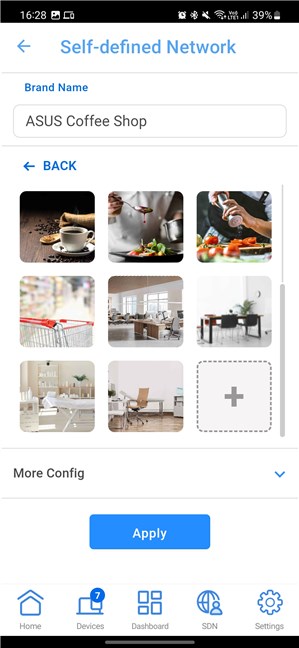
You are asked to fill in a couple of fields with information like the network name you want to use for the portal, the Portal Type, and the Brand Name you want to promote when people connect to the portal.
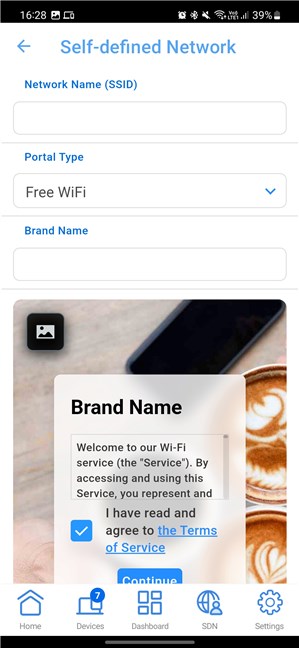
Complete the necessary information for your Guest Portal
Type the required information. If you want to change the background image used for the Guest Portal, tap the Background icon on the top left of the default image with two coffee cups.
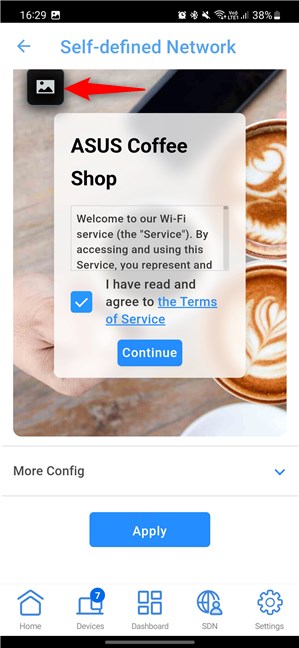
Tap the icon for changing the background image
Now, you can see a list of background images to choose from. If you want a custom image with your company logo or something more appropriate to your location, scroll through the list of images, tap the + (plus sign), and choose an image from your smartphone. If you’re happy with your settings, tap Apply.
You can choose a custom background image
If you want to personalize a couple of other settings, tap More Config below the background image, and you will be shown the same options as when creating a Guest Portal for a web browser on your computer.
You can choose the WiFi Band you want for the portal, enable and set WiFiScheduling, enable and set the Bandwidth Limiter, and turn Access Intranet on or off. Again, for guest portals, I highly recommend that you restrict intranet access for your guests to avoid negatively impacting the security of your company network.
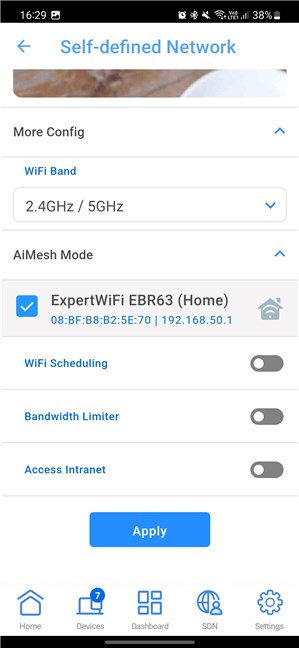
Tapping More Config reveals these options
When you’re happy with your settings, tap Apply, and ExpertWiFi takes a couple of seconds to create the Guest Portal using your settings. It is shown in the SDN section of the ExpertWiFi app when it's created. You can disable it, enable it back, and further fine-tune its settings from here.

Your Guest Portal is ready
How to change the advanced settings of your Guest Portal from the ExpertWiFi app
If you want to change how the Guest Portal works, in the ExpertWiFi, tap SDN followed by the name of the portal.
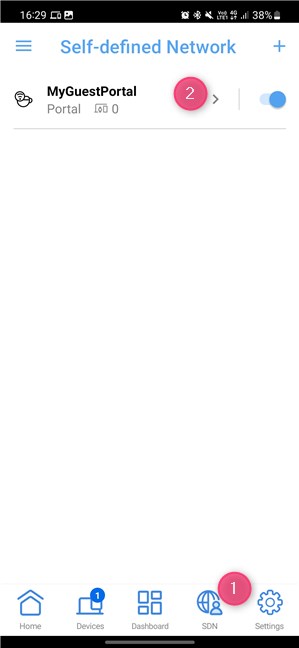
Tap SDN followed by your Guest Portal
You are then shown the same four tabs as when configuring your ExpertWiFi from a web browser:
- Network - here, you customize the basic settings that were shown earlier. You can also generate a QR code to print and share with your guests so that they connect quickly to your Guest Portal. More Advanced Settings are also available for configuring the DNS servers used for the portal and the IP addresses assigned to connecting devices.
- VPN - you can enable VPN server functionality for the Guest Portal and create VPN tunnels for different clients.
- Clients - you see a list of all the devices connected to the portal.
- Guest Portal - you can further personalize the portal and edit the terms of service and the landing page promoted by the portal.
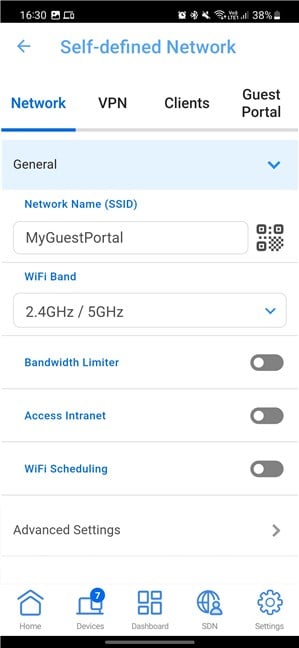
The advanced options available for your Guest Portal
Fiddle with the settings that interest you and tap Apply so the Guest Portal starts using them.
How do you like the Guest Portal offered by ASUS ExpertWiFi?
As you have seen in this guide, creating a Guest Portal on ASUS ExpertWiFi routers and business mesh systems is not difficult. You get access to plenty of customization options, which allow you to enhance your organization’s digital marketing efforts. Try it out, see how it works, and let me know what you think using the commenting options available below.