
 10.11.2020
Buying a NAS (Network Attached Storage) solution can be expensive and overkill for most home users. A more affordable option is to get an external hard drive or SSD and connect it to your router using the USB port. You can then set up the router to share the drive with your network or the internet to build your own "cloud storage." If you have an ASUS wireless router or an ASUS mesh Wi-Fi system, here's how to turn it into a NAS using a USB hard disk or SSD:
Step 1. Plugin the external storage drive to your ASUS router or Mesh Wi-Fi
Take your external hard drive or SSD and plug it into the USB port on your ASUS router or Mesh Wi-Fi system. If your router has two ports, use the USB 3 port so that you can enjoy faster speeds. If you have a USB 3 port on your router, it is a good idea to use an SSD instead of an HDD.
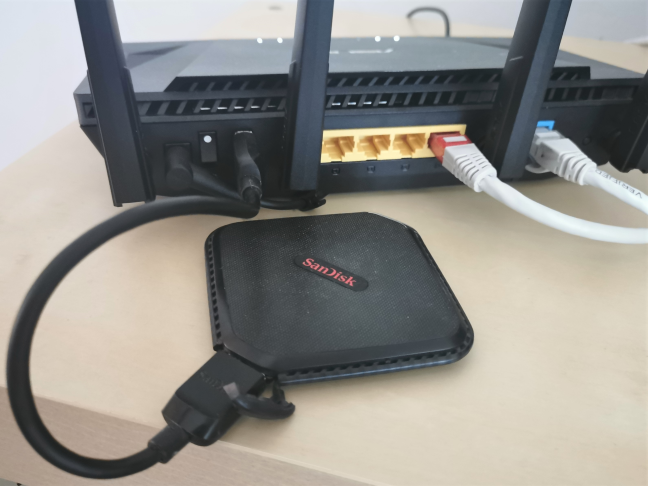
Connecting an external SSD to an ASUS RT-AX58U router via USB
However, if your ASUS router is older and comes only with a USB 2.0 port, using an SSD is overkill because the USB port on your router can't reach the speeds necessary to take advantage of a fast storage drive. Therefore, for USB 2.0 ports, classic HDDs are just fine.
Step 2. Log in to the user interface of your ASUS router or mesh Wi-Fi
On your PC, open up your favorite web browser and navigate to router.asus.com or the IP address of your router. On modern models like ASUS RT-AX58U, the default IP address is 192.168.50.1. On older ASUS routers, the IP address is 192.168.1.1. Enter the username and password used to administer your ASUS router or mesh Wi-Fi, and click or tap Sign In.
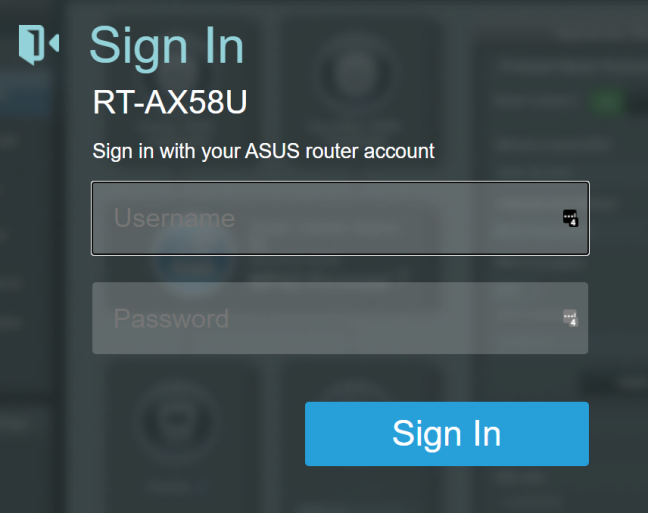
Sign into your ASUS router admin interface
NOTE: If you need help with other ways to log in to your ASUS router, read: How to login to your ASUS router: Four ways that work.
Step 3. Configure the USB mode and format the storage drive
On many modern ASUS routers and mesh Wi-Fi systems with USB 3 ports, you can configure the USB version you want to use for the storage drive that you just connected.
To do that, go Network Map, and then click on the USB device listed. On the panel on the right, choose the USB Mode that you want (remember that USB 3.0 is faster than USB 2.0) and click or tap Apply. This step is necessary because the default mode is set to USB 2.0 even for USB 3.0 ports, on some ASUS router models.
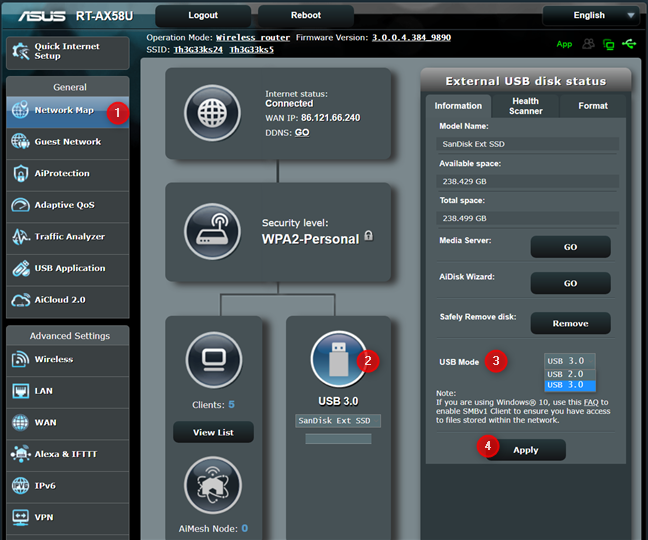
Configure the USB Mode on your ASUS router
Then, in the "External USB disk status" panel, go to the Format tab, choose the file system you want in the Format type drop-down box, and click or tap Format. If you use Windows 10 in your network, it is a good idea to use NTFS as the file system for the external storage that you connected to your ASUS router. If you use Linux, HFS or FAT are better choices.
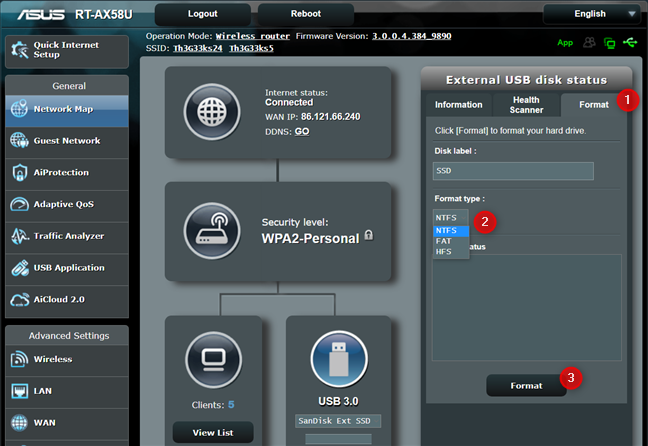
Format the USB drive from your ASUS router
Step 4. Share the external storage from your ASUS router with the network
The next step is to go to the USB Application section and click or tap Servers Center.
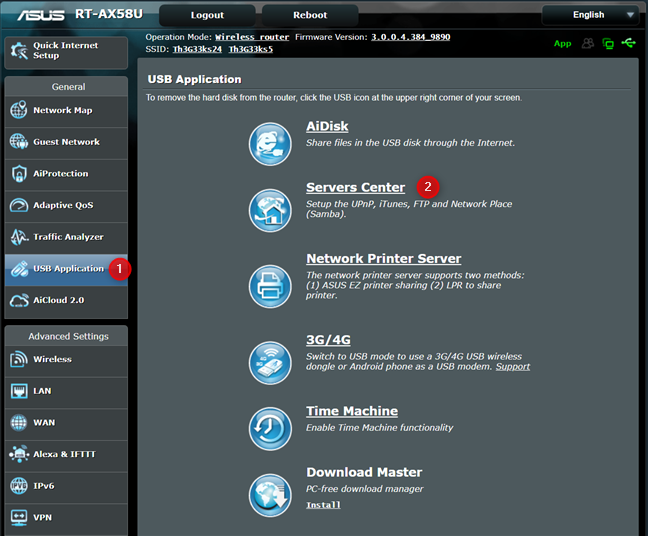
Access the Servers Center on your ASUS router
This is where you configure how you want to share your external storage with your network. You can have it act like a media server, a network place, or an FTP share. Most people will want to use it as a network place, and we will cover this situation. Go to "Network Place (Samba) Share / Cloud Disk," and set the Enable Share switch to ON.
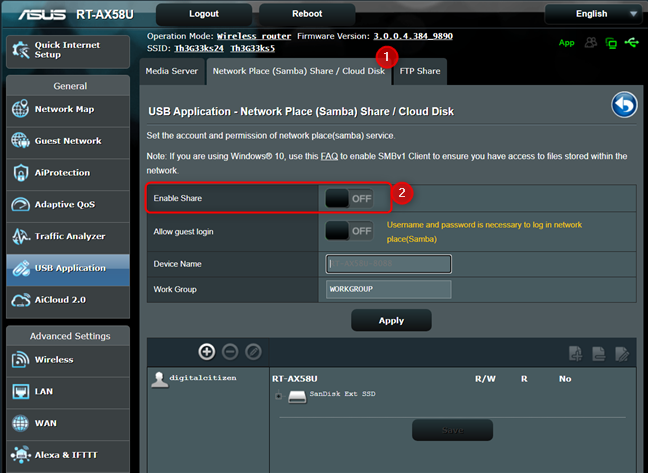
Enable USB network sharing on your ASUS router
You are asked to confirm that you want to share the disk with the network. Click or tap on OK. In a couple of seconds, the storage drive is shared by your ASUS router with the network. If you want anyone from your network to access the storage on your router without a username and password, set the switch for "Allow guest login" to ON, confirm your choice, and skip to Step 5 from this tutorial.
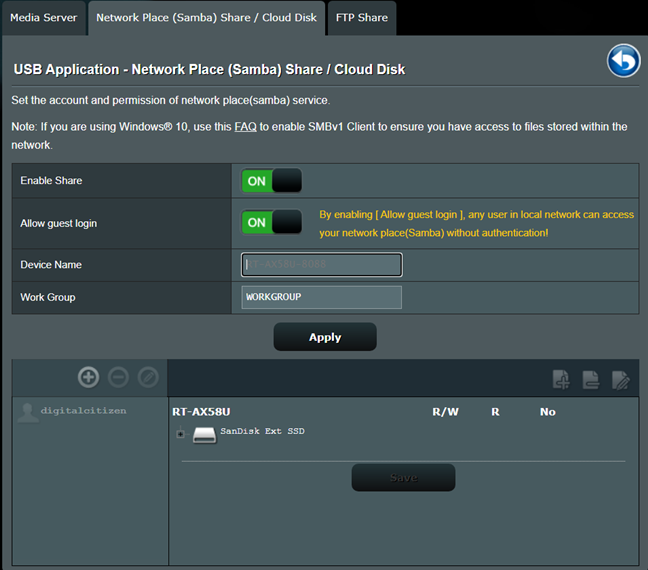
Allow guest login on your USB drive
However, suppose you want a more secure approach. In that case, you need to add user accounts that can access the storage drive, create folders, and set permissions. To add a user, click the + sign above the users' list with access to your drive. Then, type an account name, set its password, and click or tap Add. To add a folder to your drive, navigate its content to the location where you want to create it and then click the + folder sign on the top-right. Then, enter the folder name that you want to use.

Add users and folders to the USB drive
After the folder is created, navigate to it and then select the permissions that you want to assign for the selected user: R/W (Read and Write), R (Read-only), or No (No access). Don't forget to Save your changes when you are done setting things up.
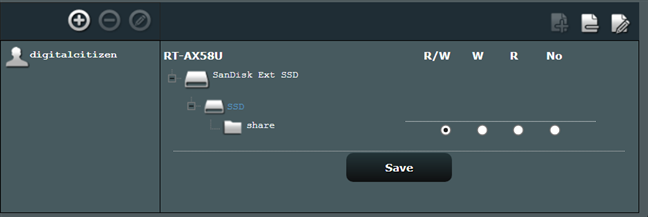
Set access permissions for the folders on your USB drive
Now you are done setting up your router to share its USB storage with the network.
Step 5. Access the USB storage from your Windows 10 PCs
To access the USB storage attached to your ASUS router or mesh Wi-Fi, open File Explorer in Windows 10, and go to Network. There, enter the IP address of your router in the address bar, or click on the router's name if it’s displayed. If you set a username and password for accessing the USB storage, enter the necessary credentials, and click or tap OK.
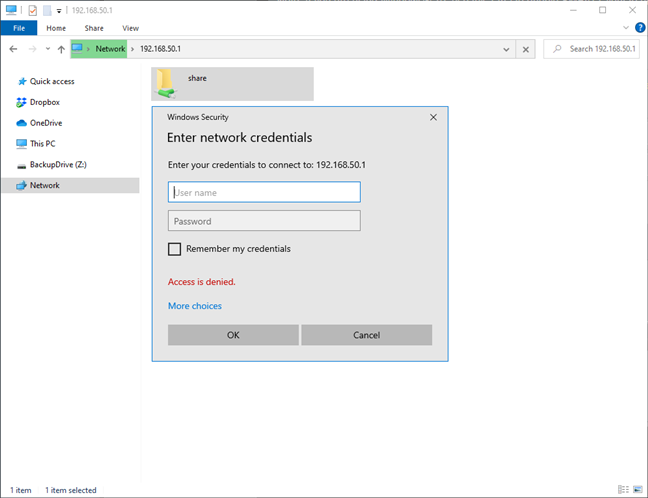
Access your network storage from Windows 10
Now, you can access the storage attached to your ASUS router as if it were a local drive, copy, paste files, etc.
TIP: If Windows 10 tells you that it can't access the network resource, you may need to change the network location from public to private. Here's how it is done: How to change the Windows 10 network location to private (or public).
Bonus: What speed do I get when connecting USB storage to my ASUS router or mesh Wi-Fi?
How fast the USB storage is on your ASUS router depends on several factors:
- If your USB drive is an HDD or SSD. Of course, an SSD is much faster.
- If your ASUS router or mesh Wi-Fi has a USB 3 port or a USB 2.0 port. USB 3 is faster.
- What USB mode your ASUS router uses.
- If you connect to the USB storage on your router wirelessly or through a Ethernet cable connection, the speed is going to be different. Cable connections tend to be a lot faster than wireless ones. To give you an idea, we used an SSD drive on a router with Wi-Fi 6 that we like a lot: ASUS RT-AX58U. Then, we wan the test below to measure the speed when using an Ethernet connection. As you can see below, we reached a download speed of 745.16 Mbps and an upload speed of 371.65 Mbps.
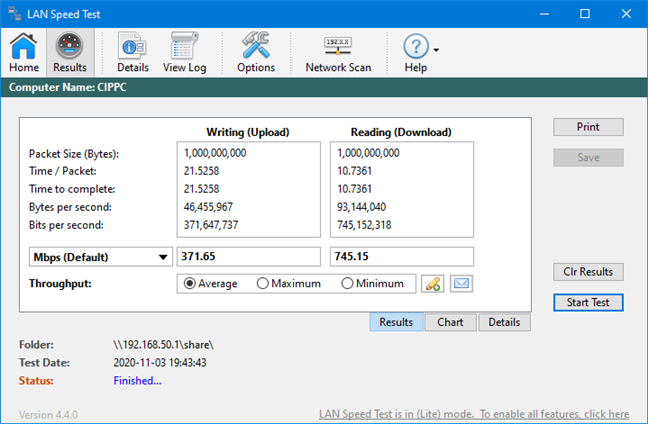
The speed you get when using an SSD on ASUS RT-AX58U
Did you turn your ASUS router into a mini NAS?
Sharing your USB external storage with the network, using the firmware of your ASUS router, or mesh Wi-Fi system can be an affordable way to have your own NAS. The procedure involved is not very complicated, even though it requires a bit of time. However, in a couple of minutes, you should be good to go. Before closing this tutorial, let us know if you enjoy using this feature and how it was the experience of setting it up. Comment below, and let's discuss.