
 03.09.2024
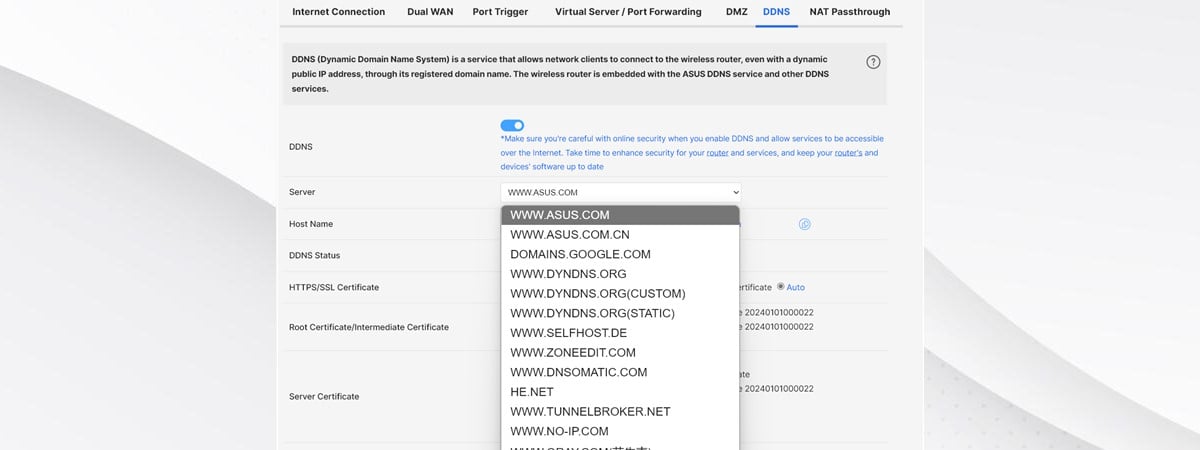
Dynamic DNS (DDNS) on a router helps bridge the gap between dynamic IP addresses assigned by Internet Service Providers (ISPs) and the need for a reliable way to access the router remotely. Many internet connections use dynamic IP addresses that can change periodically, making it challenging to maintain reliable remote access to devices or services hosted inside your network. DDNS solves this problem by automatically updating a custom domain name to point to the router's current public IP address whenever it changes. This allows users to access their network resources using a memorable domain name instead of an ever-changing IP address. Fortunately, many modern routers, including all ASUS ExpertWiFi routers and mesh Wi-Fi systems, offer built-in support for DDNS. If you have such a networking device, it’s easy to enable DDNS and set it up according to your needs. You can even use free DDNS services. Here's how it all works:
Step 1: Log in to your ASUS ExpertWiFi
In order to configure your ASUS ExpertWiFi router or mesh Wi-Fi system, you first need to connect to the network managed by it, open your web browser, and navigate to expertwifi.net. Then, log in using the admin username and password. Type the necessary credentials and click or tap Sign In.

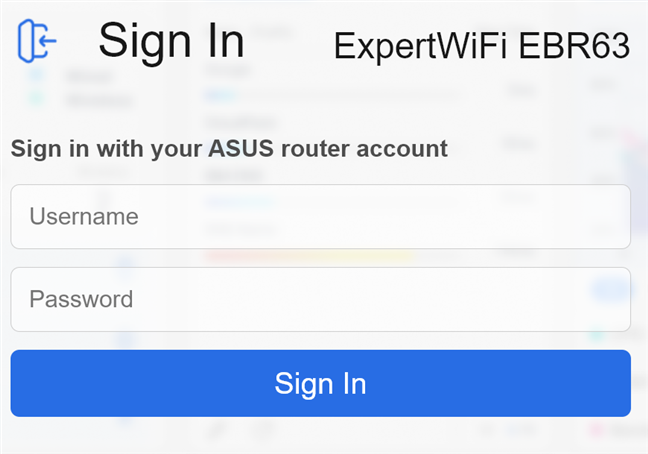
Sign in to your ASUS ExpertWiFi
Your ASUS ExpertWiFi networking equipment then displays the Dashboard. For this tutorial, I used the ASUS ExpertWiFi EBR63 wireless router. But you can use any other router or mesh Wi-Fi from this line-up. The user interface is the same on all of them, and the necessary steps are identical.
Step 2: Enable web access from WAN
One step which isn’t well documented in the official help documentation from ASUS is that you first need to enable remote access to your router/mesh Wi-Fi. To do that, go to Settings > Administration > System. Here, you see a long list of system settings for your ASUS ExpertWiFi.

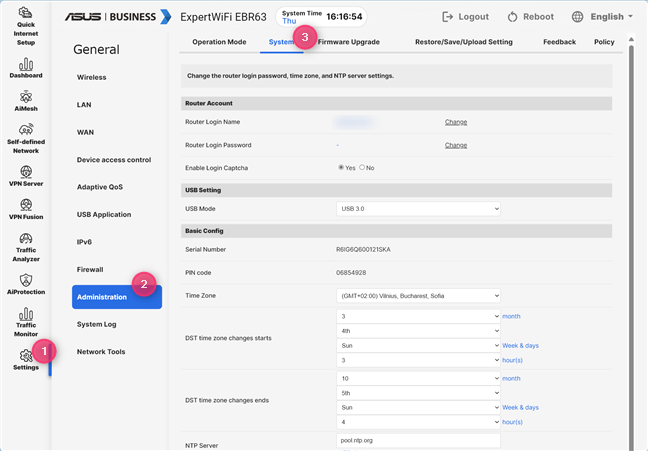
Go to Settings > Administration > System
Scroll down to a section named Remote Access Config and ensure that you check Yes next to Enable Web Access from WAN. Don't forget to click or tap Apply to finish enabling this setting.

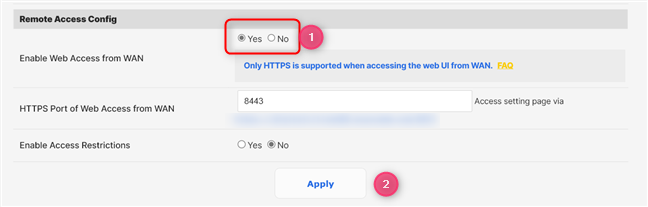
Turn on Enable Web Access from WAN
Enabling this setting is critical because, even if you enable DDNS, you won't be able to access your ASUS ExpertWiFi from a device outside your network, thus defeating the purpose of enabling DDNS.
Step 3: Enable DDNS on your ASUS ExpertWiFi
Now, it's time to enable the DDNS and configure it. You can do that by going to Settings > WAN > DDNS. Here, you can enable DDNS, choose the service you want to use, and set up the HTTPS certificate that is going to be used for the remote connection to your ASUS ExpertWiFi.

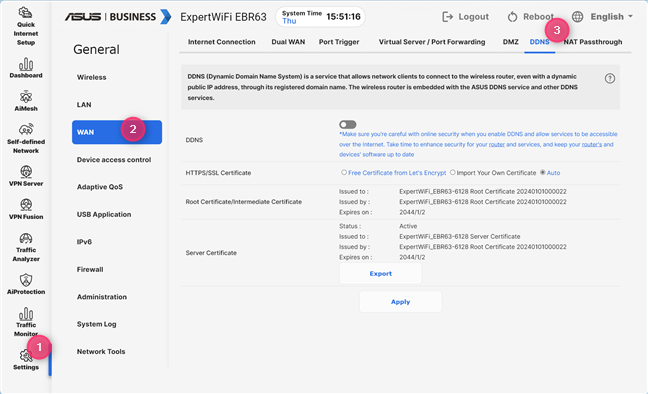
Go to Settings > WAN > DDNS
First of all, enable the switch for DDNS with a click or tap. Then, in the Server drop-down menu, choose the DDNS service you want to use. The list is long, and it includes both free DDNS services like the one(s) from ASUS and paid ones from providers like Google, DynDNS, and No-IP.
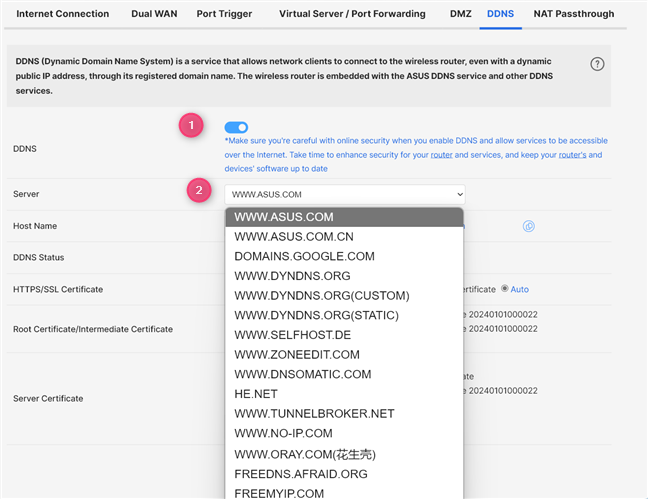

Enable DDNS and choose the service you want
Depending on the chosen DDNS service, you are required to enter additional connection information which may include items like the Host Name, a username and password for connecting to the DDNS service you selected, and a DDNS Key.
My assumption is that most people want to first try a free DDNS service on their ASUS ExpertWiFi. If this is the case for you, select WWW.ASUS.COM in the Server list, and then type the hostname that you want to use. Ensure that you use a random name, one less likely to be used by others. Then, choose whether you want to keep the Auto settings for the HTTPS certificate and click or tap Apply.

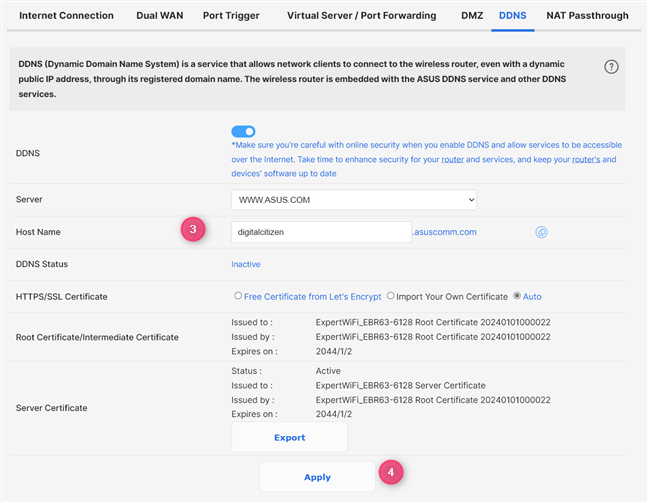
Configure DDNS and hit Apply
Your ASUS ExpertWiFi spends some time registering the hostname you’ve provided and applying your settings. When it’s done, look for the DDNS Status field and see what it shows. If everything works smoothly, the status should be set to Active.

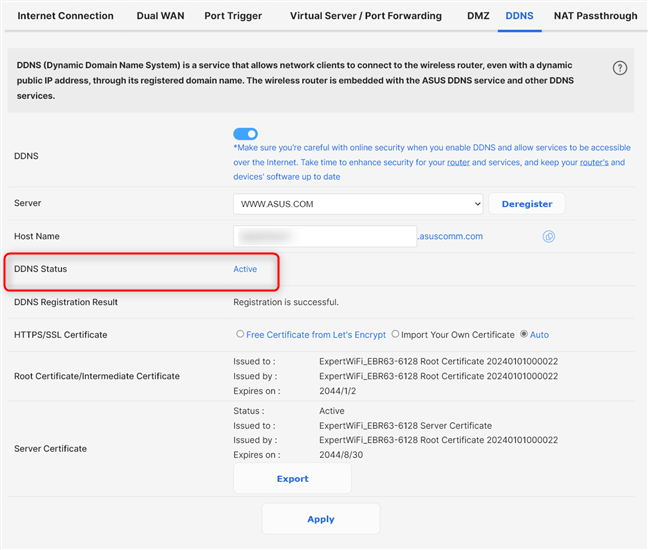
Check whether DDNS works
In some situations, you may see an error message instead, informing you that the domain name that you’ve entered in the Host Name field has already been registered by someone else. In this situation, you need to change your settings and try again.
BONUS: How to connect to your ASUS ExpertWiFi through DDNS
If the DDNS status is set to active, you may copy the hostname provided in the DDNS settings page of your ASUS ExpertWiFi. When you paste that address into another web browser and try to access your networking equipment, you may notice that the ASUS ExpertWiFi DDNS is not working, and you won't be able to access the login page that you’ve seen during Step 1.
This happens because you need to use a different address to log in remotely to your ASUS ExpertWiFi using DDNS.
You can find this address by going to Settings > Administration > System. Scroll down to Remote Access Config one more time, look for the HTTPS Port of Web Access from WAN, and copy and paste the address listed there, which also includes a connection port.


Your DDNS address
I tried this address on a smartphone that wasn’t connected to the Wi-Fi emitted by ASUS ExpertWiFi, and it all worked like a charm.


Signing in to ASUS ExpertWiFi through DDNS
The DDNS service I’ve setup on my ASUS ExpertWiFi worked like a charm, and I was able to configure my network remotely, from anywhere with internet access.
Did you successfully set up DDNS on your ASUS ExpertWiFi?
Now that you’ve learned how to set up DDNS on your ASUS ExpertWiFi, you can easily connect to it from anywhere and use it to configure your network and its devices from anywhere with internet access. DDNS makes it all possible with ease. Before closing this tutorial, I would like to hear about your experience in setting up DDNS. Drop a comment using the options below and share how you’re using this feature, any challenges you encountered during setup, or clever ways you’ve found to utilize this form of remote access.